When learning the in’s and out’s of video production, the process of color correction can seem like an overwhelming task. To a newcomer or even a seasoned editor, the amount of options, the scopes, and the complexity of advanced interfaces like Color Director or Magic Bullet can make the process difficult and timely.
Luckily, there is a solution. Cinema Grade is a powerful plugin for your editing software. It saves you a lot of time and energy to get your project looking professional and without the headaches.
But is it worth the price?
I tested it out and put together this review of Cinema Grade to help you decide if it makes sense for you. For more color grading and correcting software, check out our list of the best color grading software.
Or visit our list of the best tools for video editors for more excellent software.
Cinema Grade Review
I will be using the Cinema Grade Pro plugin for Adobe Premiere Pro on a MacBook Pro to color grade shots in the music video “Neighborhood” by Caleb McLaughlin. This video was shot on Canon R5 in C-Log2, with 8k proxy reference files.
Note that at cinemagrade.com you will see that the plugin is also available for Final Cut Pro and DaVinci Resolve.
Here is how Cinema Grade is priced for each plan:
- $69 for Basic
- $99 for Pro
- $199 for Filmmaker
From the checkout page on the website, you can view what features are available with each version. Cinema Grade Pro, the version used in this review of Cinema Grade, includes group shot matching and Xrite chart support.
The Pro version also includes training, film add-ons, and a look hacking system. Each license can be used for 2 activations.
Installing and Setting Up Cinema Grade
Installation is simple.
Once you have purchased the Cinema Grade plugin, you are given a download .dmg link. You’ll also receive a key to complete the installation. The plugin is available in the “Effects” window in Premiere after install.
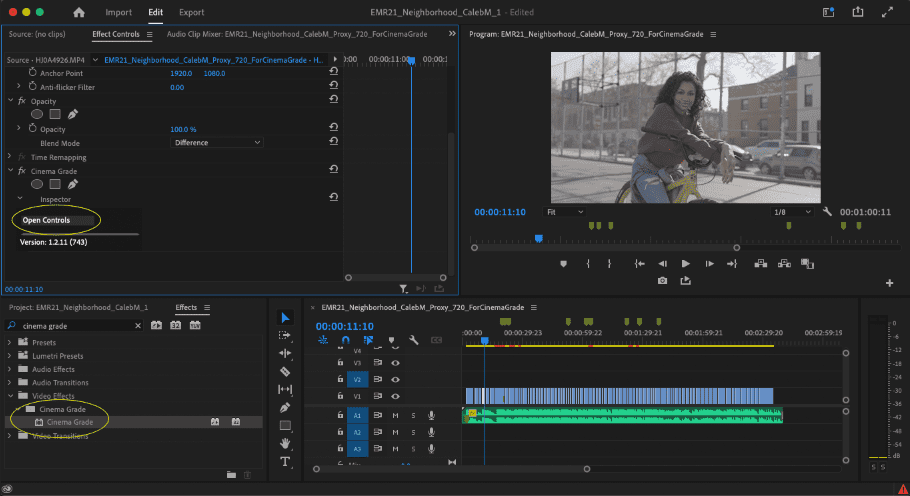
Later, it can be launched from the “Effect Controls” window of Adobe Premiere Pro.
Do not access the interface using your Finder. If you do, you will receive a dialogue box stating to access the plugin through your video editing application.

Using Cinema Grade
Once installation is complete, open your Premiere project. From there, apply the Cinema Grade plugin from “Effects” Window to the target clips in your timeline. Select one of these clips, go to the “Effects Controls” window and click “Open Controls.”
The LUT process was super simple. Here’s what you need to do:
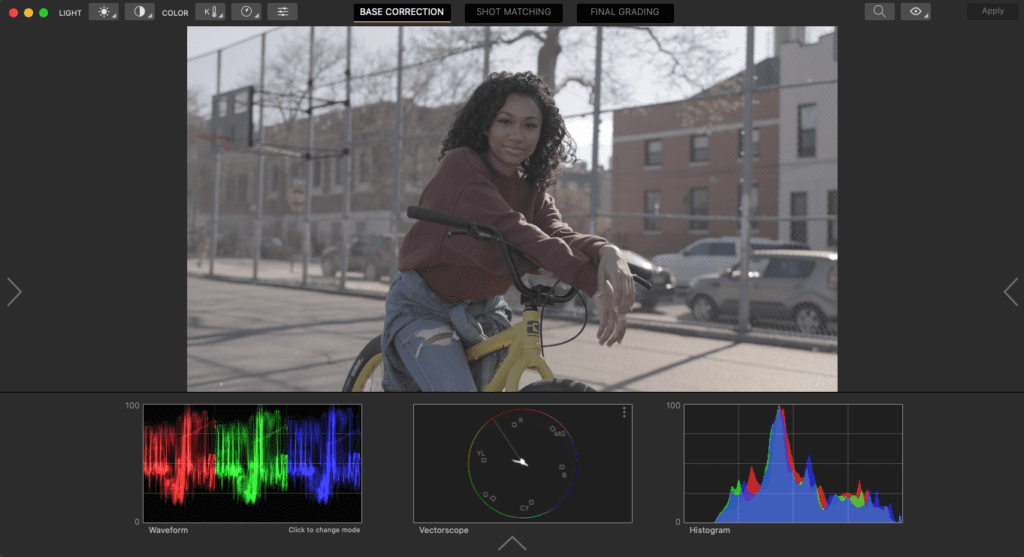
- Select one of your “Hero Shots” from the timeline in the bottom. And make sure you are on the “Base Correction.”
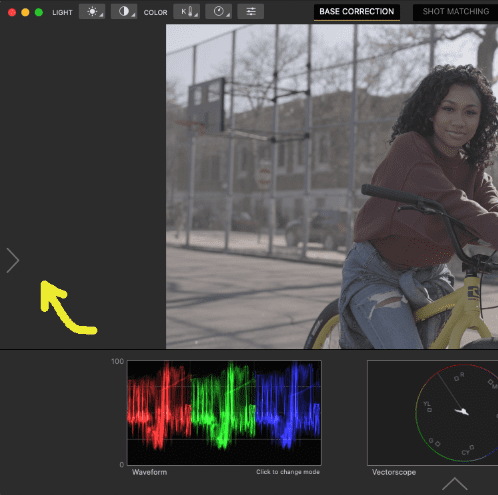
- Clicking the arrow on the left side of the display reveals a “Color Management” panel. This is where you can import and apply a LUT before making base corrections. Note that this is the method I used. Depending on preference, you may go a different route. Many people would do their base corrections and then later apply the LUTS/LOOKS in the “Final Grading” step.
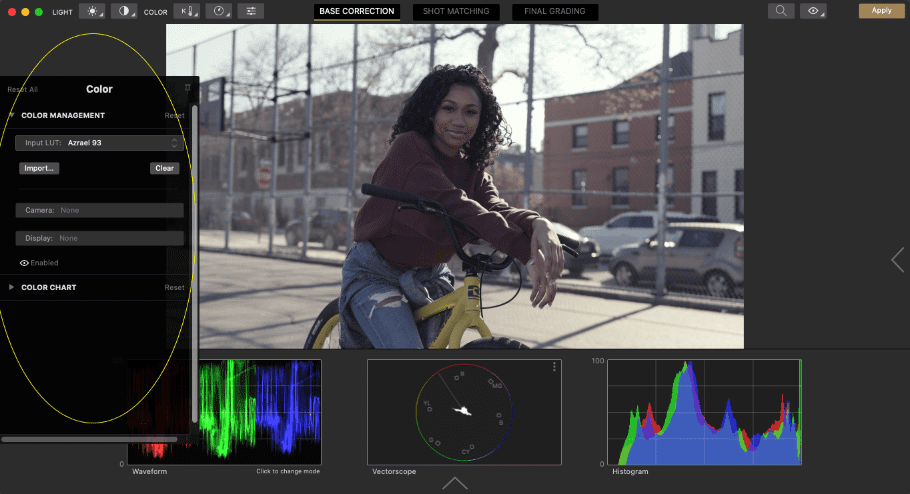
- Once you find a LUT your feeling, make your basic corrections (exposure, contrast, etc).
- By using the options at top left of the page you can easily make adjustments just using your mouse. This was easier for me than dragging the bars from left to right. There is also an option to see the full “Controls” panel through the “View” dropdown.
- The panels of “Base Correction,” “Shot Matching,” and “Final Grading” are displayed from left to right. The next step is “Shot Matching.”
- Group together shots that you would like to match. First select a colored label on the left side of screen. Then click on your “Hero Shot”. Note that the selection will be highlighted in the group color and display the text “Hero”. Match your shots into groups by clicking on the others in that group (based on scene, exposure, etc).
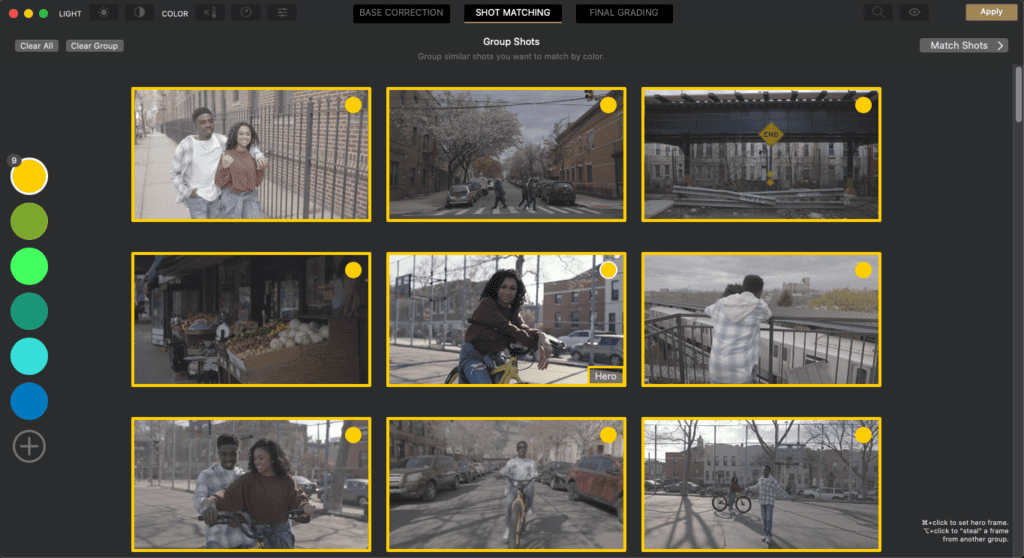
This project has just 1 group. That’s because it was filmed with 2 different cameras but all in the same location and time of day. Click on Match Shots once the group is selected and the shots highlighted.
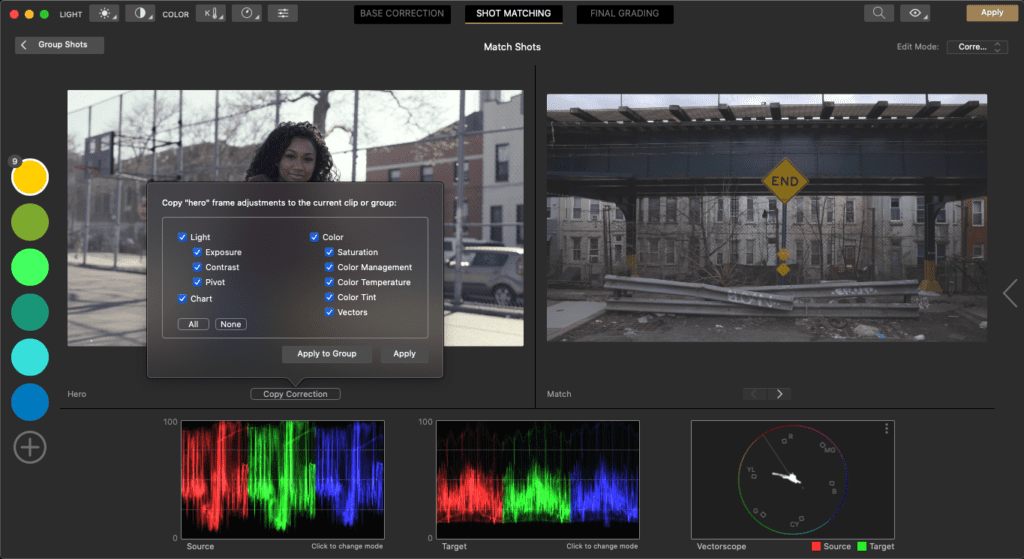
From here you can copy all or some corrections to the shot in the display or the entire group selected. This does a pretty good job of doing an exact match. The match can be judged using the vector scope comparison view.
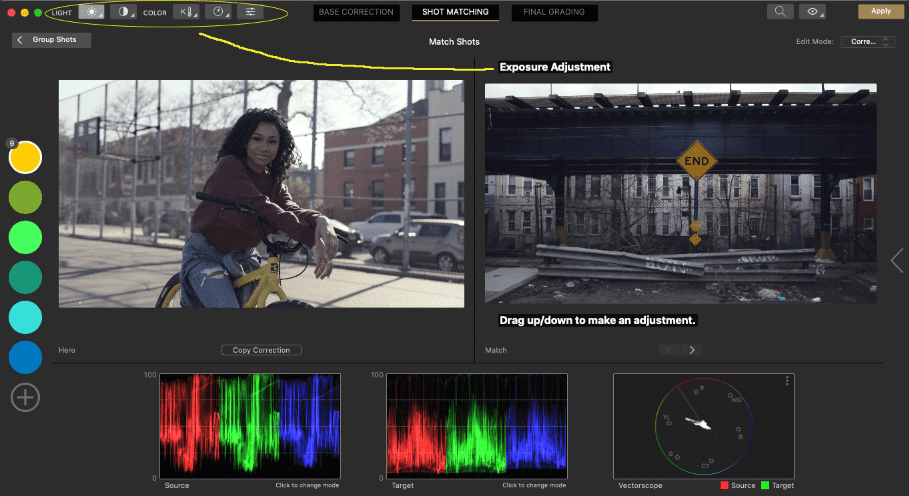
However I still had to go back through and make some exposure and saturation adjustments to several shots. This can be done in the same manner as you did in the “Base Correction” step. You do this by selecting the adjustments in the top left corner of the screen, and dragging the mouse to apply them.
Finally, apply the changes to your Premiere timeline. Just click “Apply” in the top right hand corner of the screen.
Try Cinema Grade today!
Cinema Grade Pros and Cons
Pros
- Ease of installation – Cinema Grade works seamlessly with Premiere. And it didn’t appear to bog down the system. The response time was swift, even with a basic MacBook Pro setup. Note that I was using Proxies during my Cinema Grade review.
- Shot matching – Having the vectorscope comparison display and being able to make quick adjustments in the “Shot Matching” menu sure beats eyeballing or using other copy and paste methods. The ability to group shots with a color labeling system makes for easy selections of the groups you want to view and adjust.
- Perfect for a prosumer – The combination of LUTs and the easy to understand and navigate plugin layout mean you can cut down on time. Cinema Grade drastically reduces the time it would take for the average producer.
- Additional adjustments easy – Coupling Cinema Grade with Lumetri color or other Premiere effects to do additional secondary color adjustments, keying, etc., makes for fun and easy footage manipulation.
Cons
- Cinema Grade is not necessarily ideal for detailed correction. There’s a lack of secondary color adjustment options within the actual plugin itself. This means that if you wanted to just use Cinema Grade as a single effect on the clips in your timeline, you’ll have a lackluster result.
- If using a LUT in your initial base corrections as I did, there are no preview displays as there are in the “Final Grading” step. It is a dropdown with only 10 LUTS allotted at a time and no preview.
Overall Cinema Grade Rating – 9/10
Cinema Grade took mere minutes for me to fully install and begin doing pro-level color correction on my music video. And only a few more minutes to get a satisfactory comfort level with the plugin.
For a project that had only 1 location with 2 different cameras, the process of getting a pro-level color grade took significantly less time than on the first pass using DaVinci Resolve.
However, with the ease of use in the Shot Matching feature of the Cinema Grade, I could see how a significantly complex color correction job could be made simple and organized. This simplicity is due to the grouping system, vector scope comparisons, and the ability to make basic adjustments in the “Shot Matching” step itself.
For a prosumer who is either new or unskilled in the process of Color Correction, this plugin is great tool. It will help to improve your confidence in adding color to your project. And for a seasoned professional who needs an efficient method to making quick Color Corrections for many projects accurately, Cinema Grade is an invaluable plugin.