You just returned home from a street photography session and are eager to jump into the editing process. You know you created some strong images and want see them on the screen, edit them, and share them across your social media. Having a strategy for editing can make this process go smooth, quick, and creative.
But what is the best way to edit street photography?
For me, this is one of my favorite points in photography and I have created a workflow that incorporates creativity and efficiency. Drawing from my proven landscape photography workflow, my street photography editing path is a great way to not only create a personal style, but flex my creativity and have work I can be proud to put in my portfolio.
While there are many photo editing choices out there, this workflow is designed and tested with Adobe Lightroom and Photoshop.
Step-by-Step Guide to Editing Street Photography
Step 1: Importing and Organizing Your Photos
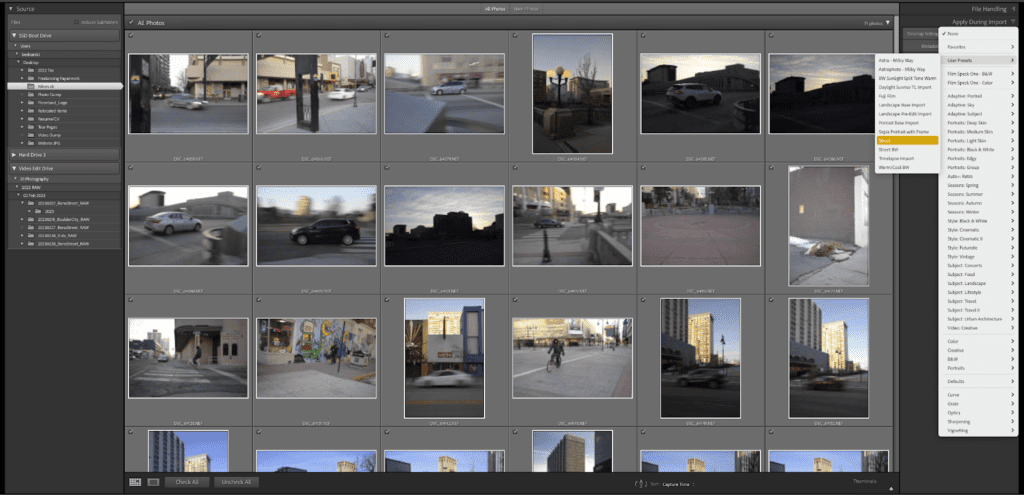
First, the import. The images from your media card must get onto your computer and backed up. This can be done all in one step. As this is the first step in your content management strategy, or CMS, it is prudent to develop a naming protocol that remains consistent.
Naming System for Street Photography
The system I use, shown below, has many benefits:
- Easy to remember
- Recalling photographs in my catalog is simple
- Well organized
- Professional
Here is how I name every photograph I ingest:
MonthDayYear_SessionName_OriginalFile
Ex: #20230207_StreetPhotography_0459
I have been using this system for years now. I find that when I go to recall an image, I just have to think of which month the photography trip, gig, or outing was in and then I can quickly pull up the batch of images. I continue this naming process when I export the RAW images out of Lightroom as JPGs.
Thus the file names will look like this:
MonthDayYear_SessionName_OriginalFile#
Ex: 20230207_StreetPhotography_0459
This also the time to add any presets to the images. I talk more about presets below, but if you have any you add them now. Then Lightroom applies them to each image as it ingests the photographs onto your computer.
Step 2: Culling Your Street Photography Images
Sometimes street photography can lead to a lot of images. Depending on how you work in the field you may have dozens. or even hundreds, of photos that need to be sorted and selected. As a photojournalist, this step is often the most daunting when working on editorial projects.
Because of this, I have created a street photography editing system that allows me to cull my images down to a selection that best represents the story I aimed to create.
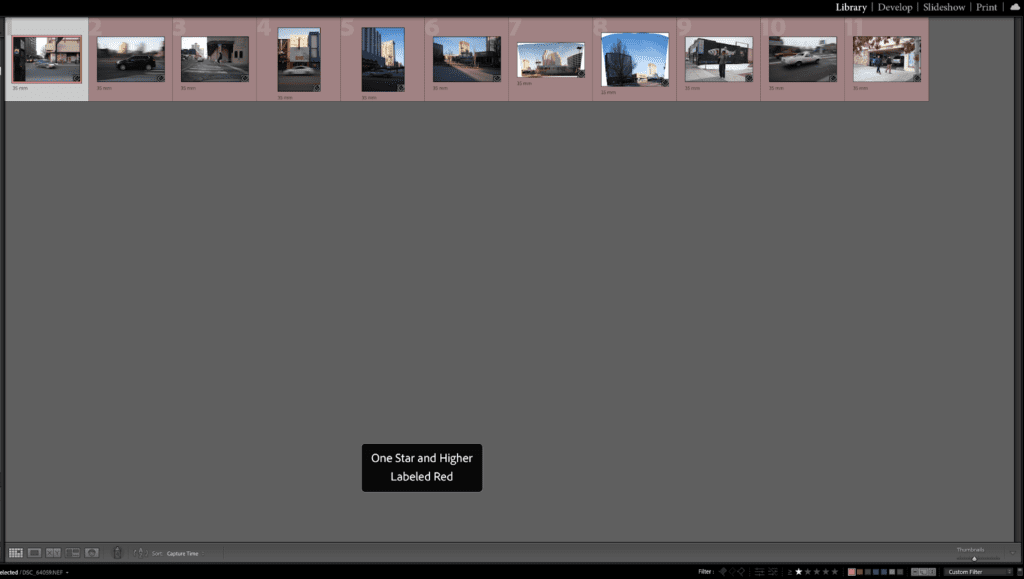
First, I quickly file through them looking for obvious technical mistakes. Using the shortcut ‘N’ I can view each image individually and scan for the wrong focus, bad exposure, or compositions that did not meet the goal. As I sort through these images I apply a color label to the images I plan to keep.
The goal in this process is to separate the editable images from the uneditable images. What I look for the most is a balanced exposure and correct focus. I am not as concerned with composition in this step.
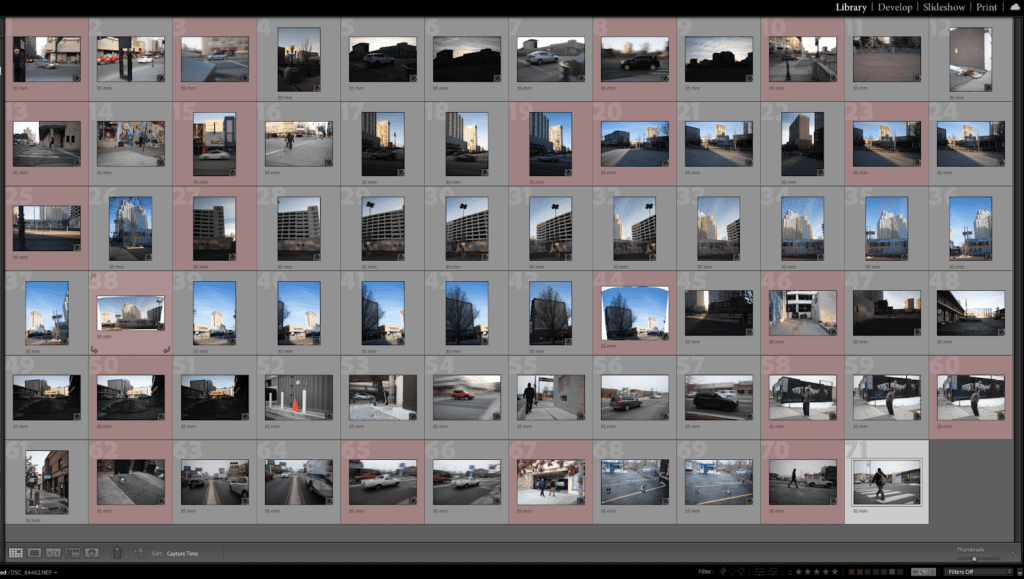
Lightroom has five color labels: Red (Keystroke 6), Yellow (Keystroke 7), Green (Keystroke 8), Blue (Keystroke 9), and Purple. While the color choice is not important, what matters is the same color is selected for each image I keep from the batch.
After I go through the lot of images, I have reduced the selection anywhere from ¼ to over ½, sometimes more.
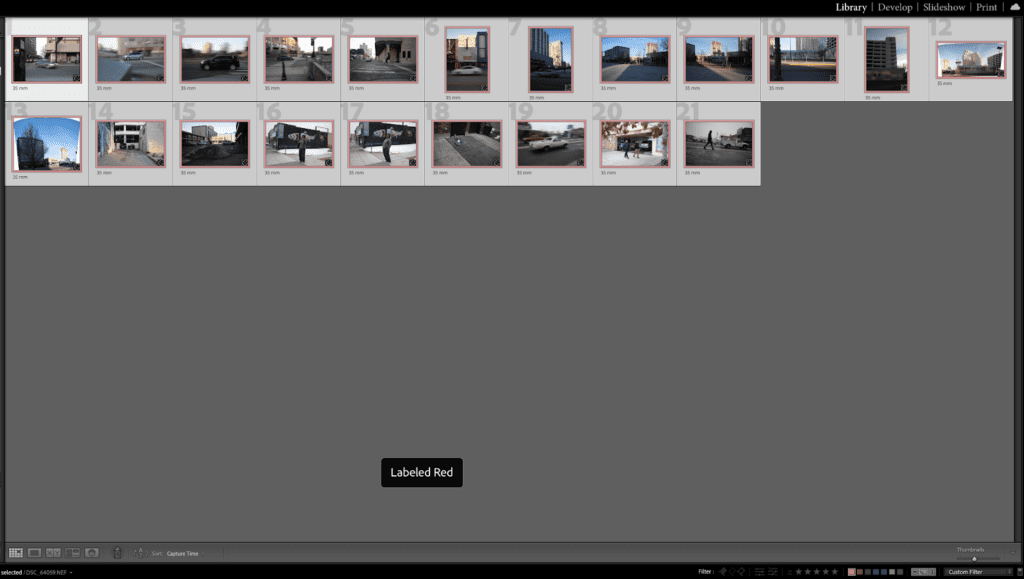
Contrary to some workflows, I then select the un-labeled photos through Lightroom’s filtering option and delete these images. I know some photographers keep every image. For me, I know I will never use the missed focus, exposure, and bad composition images so it allows me to save storage space. These images hold far less wight than with my editorial or commercial work.
Step 3: Rating the Images
Once I have culled my batch of street photography images down to the technical best, I can then start selecting which ones I want to spend more time on editing. Depending on how many images I have I may edit the entire batch. However, for some street photography sessions, I come home with a lot of images.
Quickly Repeat the Culling Process First
Thus I then repeat the culling process but with a finer eye to composition and details. When in the field, I often like to ‘work a scene’. That means I push the composition and create several versions of a subject. I find this composition process dovetails nicely with street photography. But it results in more sorting through of images.
As I once again sift through the images, I am applying a label. But this time I use a star. Lightroom (and most other editing software) has a five star rating system and they correlate with numbers one, two, three, four, and five.
After using the Survey (N) keystroke, I advance the images with the arrow keys and when I find a strong composition, one that is worth further editing, I rate it with one star (1). Soon I have reduced the batch of images to a smaller lot. The unrated images I do not delete. Knowing they are editable, I may come back in the future and decide the composition is strong. Later I may want to incorporate the image into my portfolio.
Once all of the images have been rated with one star I then start in on editing.
Step 4: Edit Street Photography Images
Once the images are culled down to a sizable amount, it’s time to edit them. In this case, it was a short street photography session so I only have 11 images to edit.
Pro tip: having a proper photo editing monitor is ESSENTIAL for this step.
I have several presets that I use for street photography. I use these to create the same stylistic starting point for all of my work. This insures that in the end, my style, or look to the images, will be similar and cohesive when the work is viewed together.
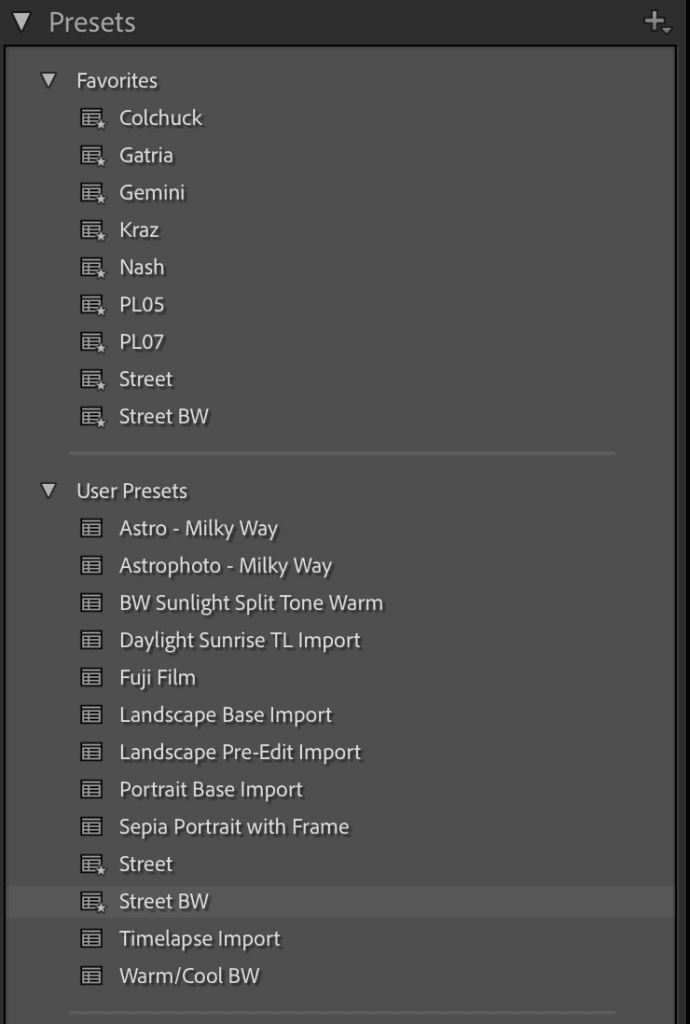
This process also speeds up editing time. During the culling process, I discard the images with poor exposure. I know that my presets work on images that are within a given exposure range, so applying these presets in bulk when editing my street photography speeds up the process immensely.
Even then, I will still go through each image. To enter the Develop panel, you simply press the keystroke D with one image selected. When editing, I work my way down the panels on the righthand side, beginning with Treatment and/or Profile.
These two are usually selected by my preset and I can just move onto the Tone section. Because I have selected well-exposed images, I am only doing minor adjustments with exposure, highlights, shadows, whites, and blacks. My preset has already boosted the Texture, Clarity, and Dehaze; I typically will leave these sliders alone.
Next up is the Detail Panel where I adjust for any Noise and Sharpening.
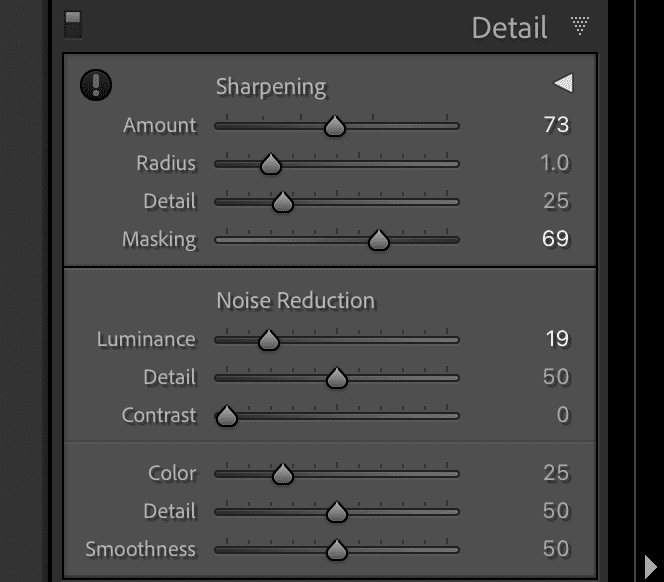
Depending on each image, I may or may not use masks. Finally, I will go through each image and look for dust spots and clean those up using the healing tool.
Once I’ve reached this stage, I am ready to export the images into JPG files for sharing across my social media channels.
Step 6: Exporting the Images for Final Use
With all of my images properly culled and edited, they are ready to be shared. Here’s my process:
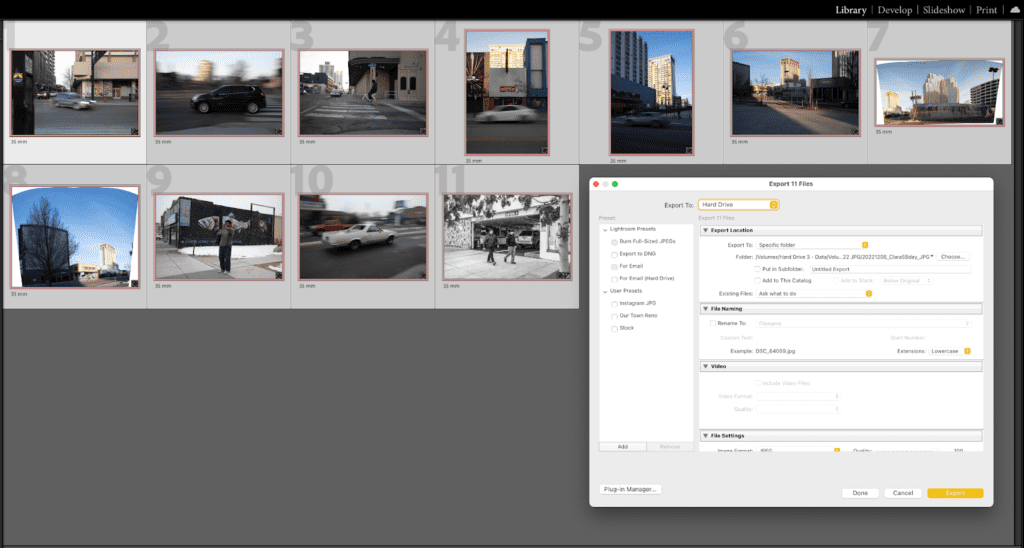
- Back in the Library module (Keystroke G), I select the images and click export.
- I select the destination folder and do not change the name of the file. This will keep it within my naming protocol and allow for easy finding.
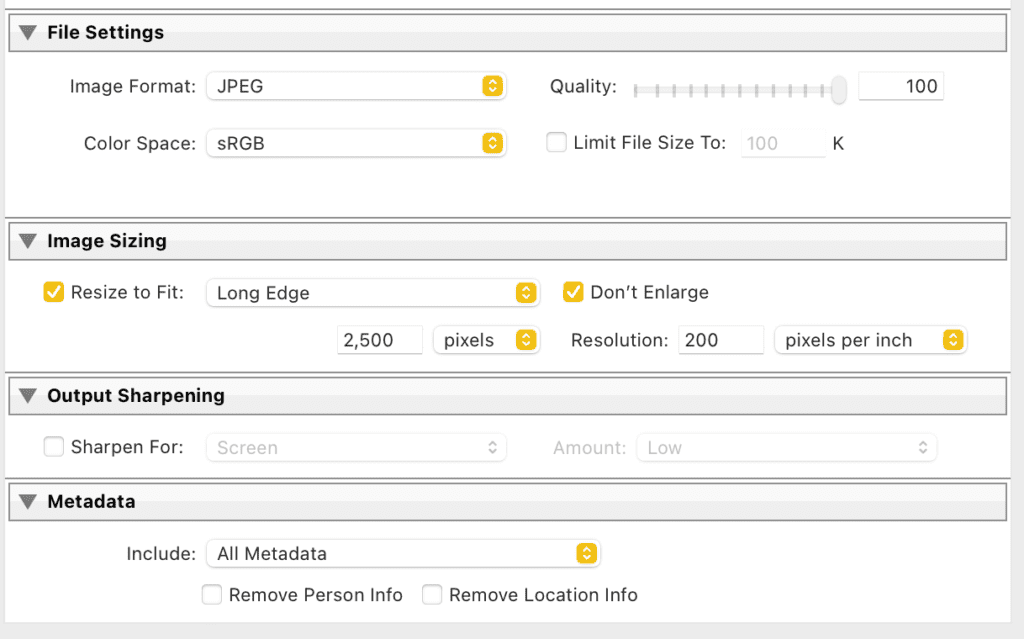
- In the exposure panel, I scroll down to File Settings and Image Sizing.
- For the settings, I make sure JPEG is selected and the quality is at 100 with the color space set to sRGB.
- For the image sizing, I click the resize to fit box and select the Long Edge from the menu. I also click “Don’t Enlarge.”
- Below this, I enter 2,500 pixels for the long edge with a resolution of 200 pixels per inch. I have found that for my cameras, this results in an image file size of three to six megabytes. This is the perfect balance between resolution, image quality, and ability to upload to social media.
- Then I click export and my work is done.
Street Photography Editing Keys to Success
While this system has proven to work for me, it may not work for you if you replicate it exactly. Experiment and have fun. The key is to find places in your workflow that can be automated through the use of presets and keystrokes.
Most importantly is that you develop a workflow, naming protocol, and presets that remain constant. This helps speed the process up and create a photographic style that is easily replicable.
Find what works for you and commit the process to memory. As time goes on, you will find tweaks here and there in the process, this is fine as long as you remain consistent and equal in the entire editing process.
By doing this, your digital library will remain organized. All that is left to do is go and create images.
If concert photography is more your thing, check out these guides:
- How to Edit Concert Photography
- Best Cameras for Concert Photography
- Best Cameras for Concert Videography