Neat Video is a plugin available for most video editing platforms that helps video editors remove noise and grain from low light footage.
If you’re considering this program, check out this Neat Video review and tutorial to get an understanding of if it’s the right program for you. You can read the Neat Video review transcript below (this transcript was created using Trint).
Neat Video Review
Neat Video Review Transcript
Ted Cadillac here for besteditingmonitor.com. And I’m going to give you guys a lowdown on Neat Video Version 5.
The plugin is available at neatvideo.com/purchase for $75 and is compatible with Adobe Premiere and After Effects, Final Cut Pro, Resolve and most other video editing programs.
Today we’re going to be doing a quick features overview and review using Adobe Premiere Pro. This is some footage that I shot in a really low light club environment with iPhone 12. So it’s got a lot of noise and it needs a lot of work.
I’ve actually been using Neat Video since 2013 when I worked with touring artists, so I was in a lot of situations that were low light or outside at night and often without a light source.
When you run into these situations without a light source, sometimes the only thing you can do is bump up your ISO or your gain level, and when you bump up the ISO or your gain level, you get the noise and the grain, color banding and other issues.
Neat Video Version 5 provides an extremely user friendly and speedy way to save your footage while still maintaining good clarity and detail.
Installing and Using Neat Video
Installation is easy.
- Just install the .dmg and next time you open Premiere it’ll be in your video effects drop down.
- Drag the Neat Video filter onto the clip that you’re going to use. I’m going to use this one right here where I had a light source, but it’s still pretty noisy as you can see.
- Make sure in your effect controls window, the effect is above Lumetri Color or other effects you may have. It’s a temporal effect and, long story short, rendering that will either crash Premiere or at the bare minimum, slow it down to a standstill.
- Now I’m going to choose a frame with an area that has a lot of noise and is also featureless.
- Then I go over here, click the prepare option underneath your reduced noise plug in.
- Once that’s complete, you click build and this will open a new window where the Neat Video controls are located.
- So for starters, depending on if you’re a beginner at this or you’re advanced, they have a beginner and an advanced mode. If you wanted something quick, you could use this generic profile option and use the generic noise slider to adjust the strength of the correction.
- Hit apply and boom, you’re out.
But this just scratches the surface of Neat Video’s capabilities.
Neat Video Advanced Features
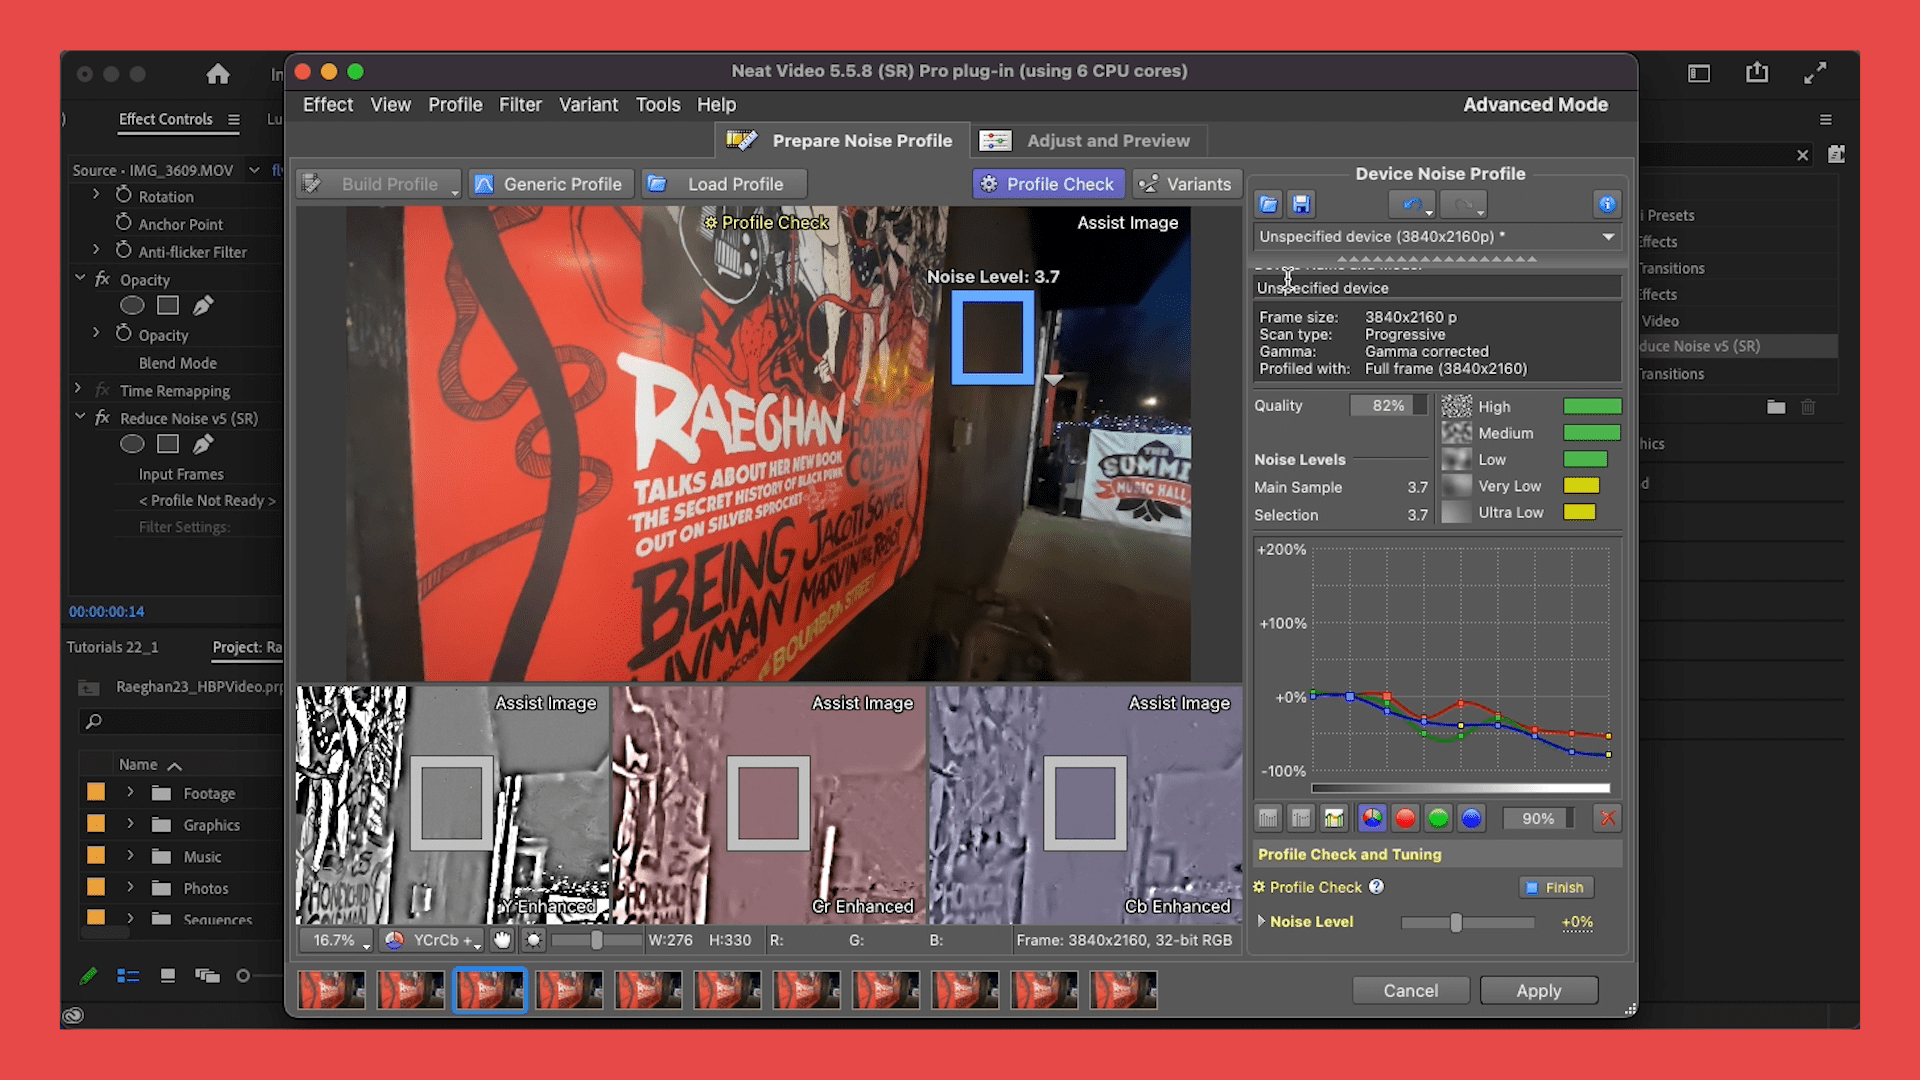
So instead we’re going to do a quick run through of the advanced mode capabilities. Here you can either choose to auto profile the clip or find an area of your frame without varying details, and that has a consistent and high noise value. Basically, find a featureless area and click and drag a box like this around the target area until the indicator turns green, and that’s referring to the size and consistency check.
From here you can click, build a profile and let Neat Video do its thing.
Before we move over to the adjust and preview adjustments, you can select profile check for a preview of the corrections. You can create variant profiles so you can easily hop back and forth between multiple profiles that you may build and do automatic and manual fine tune adjustments. And then all of that can be saved up here and reloaded on the future clips for quick access and correction.
Let’s move over to the Adjust and Preview tab. Up here, click the filter settings check dropdown and this is going to be your standard operating procedure for fine tuning the adjustments.
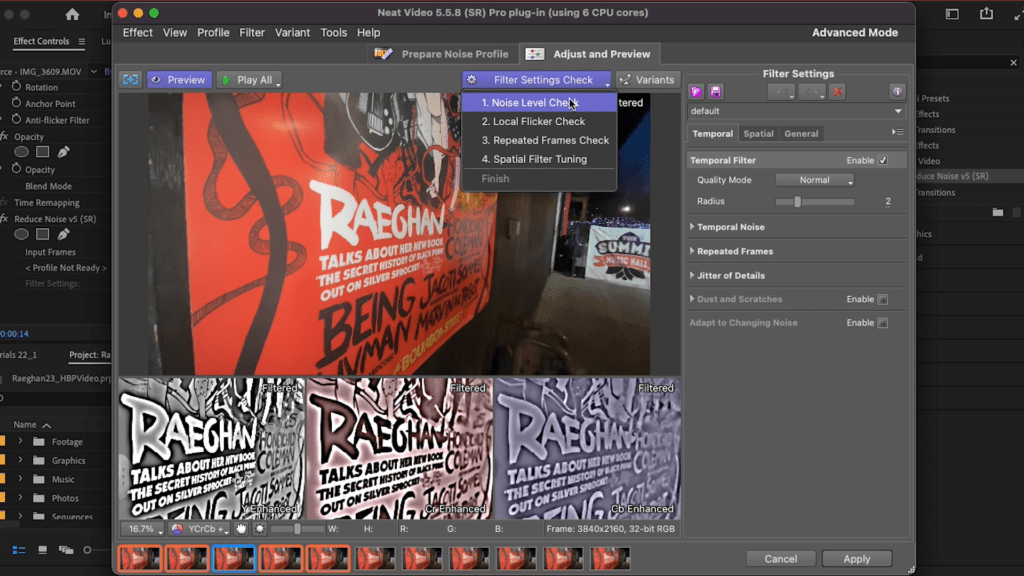
First is the noise level check and you can use this noise level slider here to find a good balance between image detail and noise reduction. So it comes up with this blue mask right here and you can make the adjustments accordingly.
Local flicker check is more of a concern generally when you’re shooting film, but click play all, and it’ll show with the blue mask, the gray areas, and that’s where the local flicker is. And you can use the slider accordingly to cover that.
If there’s still inconsistencies after those too, which they’re normally isn’t, you can continue to the repeated frames and spatial filter tuning.
So if you shot an extremely slow shutter to compensate for low light in an environment, the repeated frames check is going to be important.
My suggestion would be to watch and subscribe to Neat Video’s YouTube channel. They’ve got in-depth reviews and explanations on all the features of the products, including all these filter settings check.
Again, your filter settings can be saved in this window for quick access and correction.
Once this is all wrapped up and you’re happy with your results, hit apply and render your clip for playback on the premiere timeline.
Let’s give it a whirl on this segment I have right here and see how Neat Video does.
Overall Review of Neat Video
I’ve been using Neat Video for literally a decade at this point, and the features were not even the same back in 2013. So using Neat Video Version 5 now is amazing. It’s got endless fine tune adjustments. It’s easy to preview your progress in the monitor and it’s flexible for the many situations that you may run into when filming in low light.
So I’m super excited to continue using it moving forward in my low light situations.