
With services like Trint and Rev, captioning your videos can be done in several easy steps, without the need to use a human transcriber that can cost more and take much more time.
Here, I will detail how to use Trint to transcribe and caption videos in Adobe Premiere Pro.
Visit this post to see how Trint compares to Adobe Premiere Pro for video captioning.
View “Tour De Mural”, the video series being edited in this tutorial here: https://www.youtube.com/c/HakimsArtNStuff
How to Use Trint for Transcribing Audio and Captioning Video
After you’ve signed up for Trint (and Adobe Premiere Pro), here’s how you can use Trint to transcribe your video footage and add captions to your final video render.

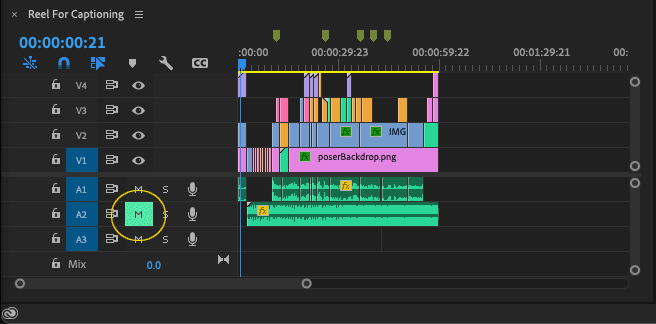
1. First, mute non-essential audio tracks on your sequence (music, Sound FX, etc). Isolate the spoken parts you wish to caption and mute all other audio components.
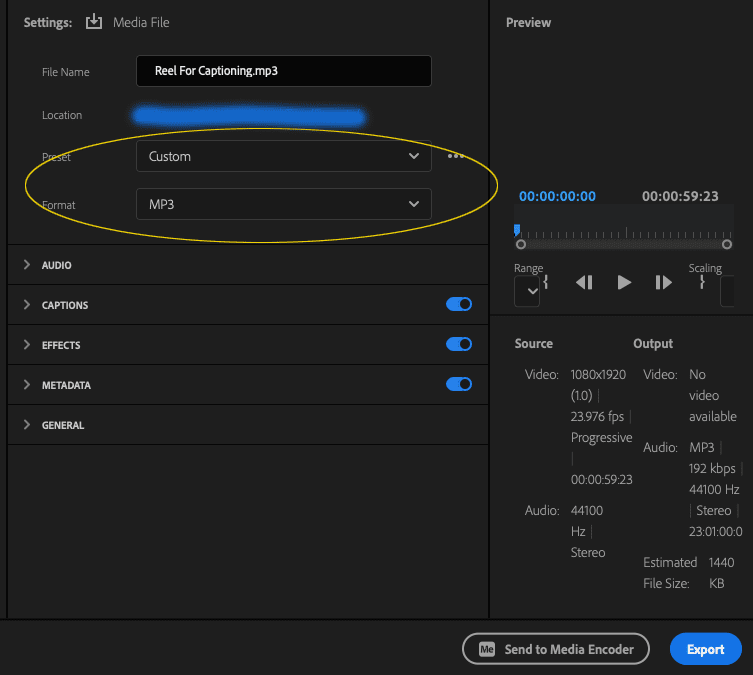
2. Export this as an .mp3 audio file.
3. Sign up with Trint.Com.
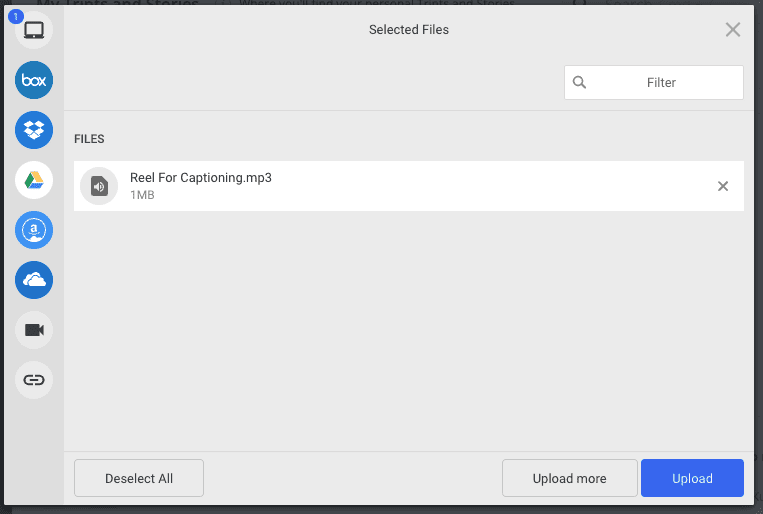
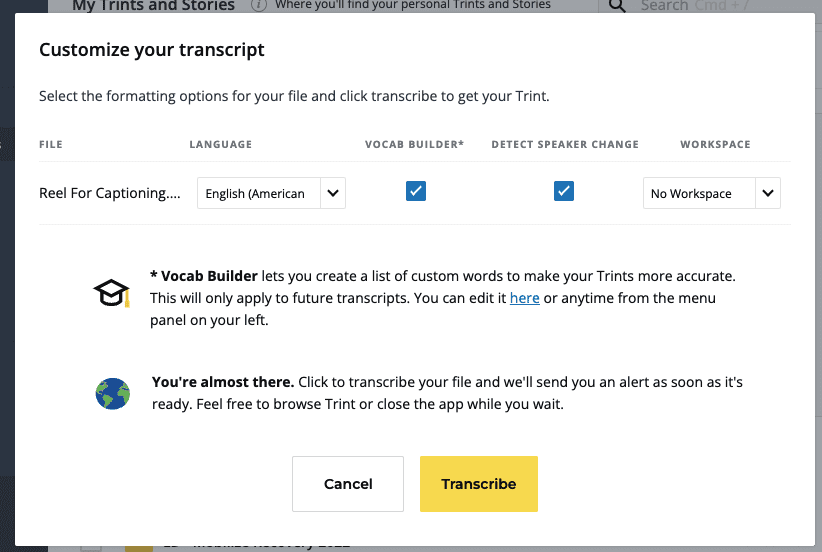
4. Select the “Upload” option and upload audio file. Then once uploaded, select the language used and click “Transcribe”.
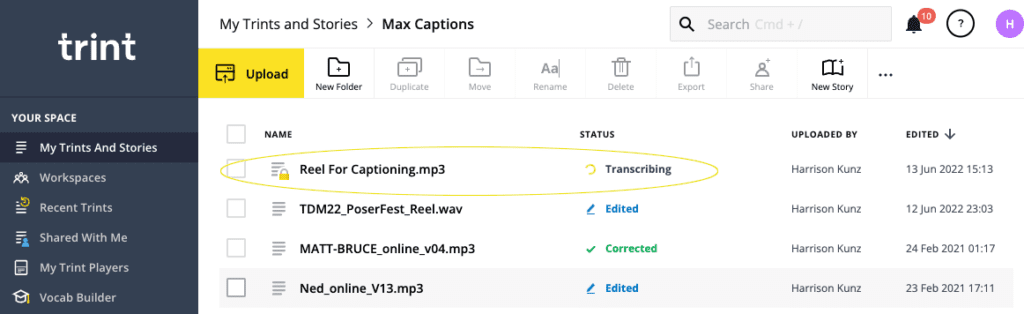
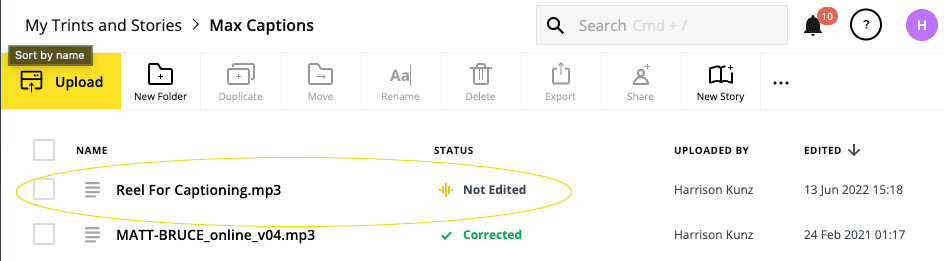
5. Wait while Trint does the initial transcription. When the file is ready for editing, the “Status” panel will read “Not Edited.” Depending on the length of the audio file, this process can run from several seconds to minutes.
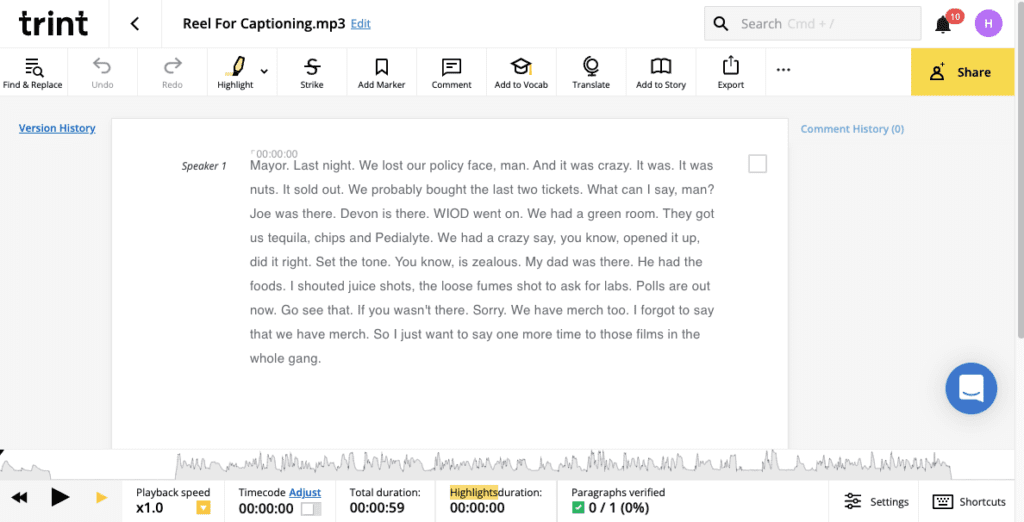
6. Manually edit your transcribed audio. Read through the transcription and edit the text as you would a Word document to ensure accuracy. You can actually play the audio as you are reviewing it, and the text will highlight words as it plays through.
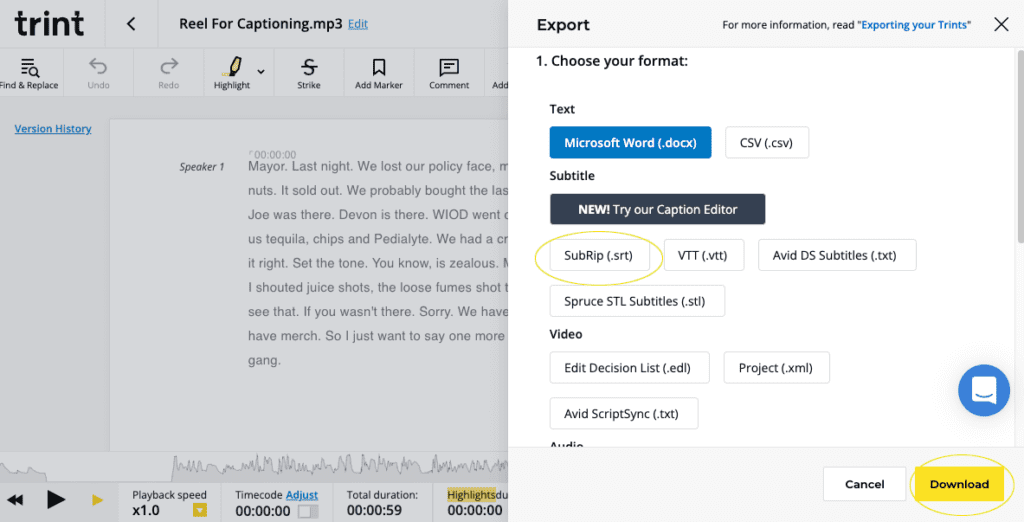
7. Click “Export” and select Subrip .srt. Then, download it.
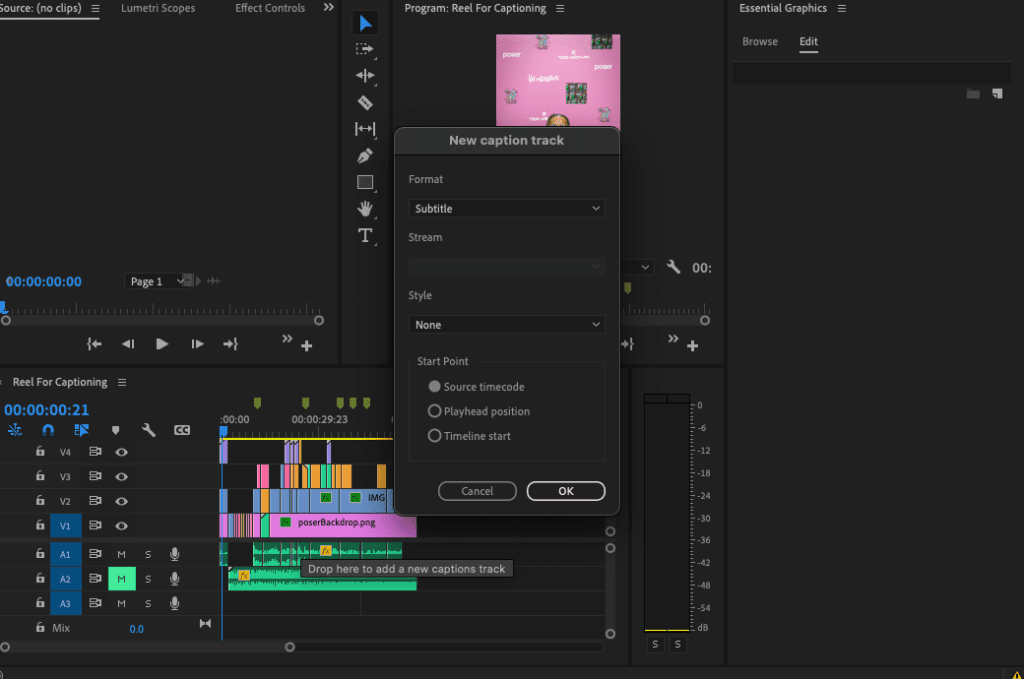
8. Import your downloaded .srt file into Adobe Premiere Pro.
9. Drag the .srt file from your browser onto the chosen sequence. A dialogue box will appear. Use the “subtitle” option, with the “Source Timecode” option selected. Trint will automatically have embedded the timecode.
Try Trint Today
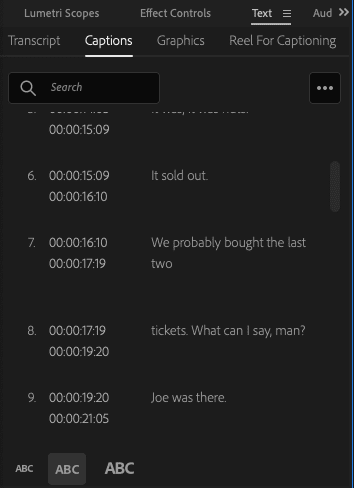
10. Using the “Text” window in premiere make any additional text corrections. If it is not possible, go to the “Window” dropdown on Adobe Premiere Pro and select “Text.”
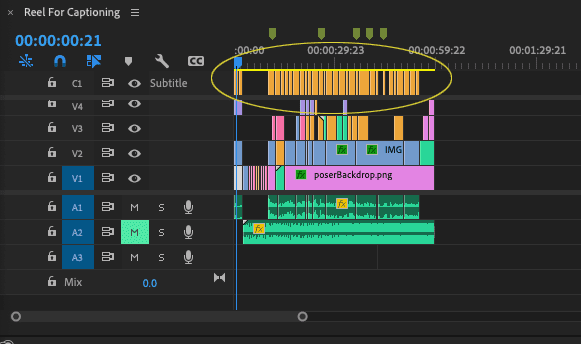
11. Adjust the timing of the captions in the timeline the same way you would trim, cut, or extend video clips.
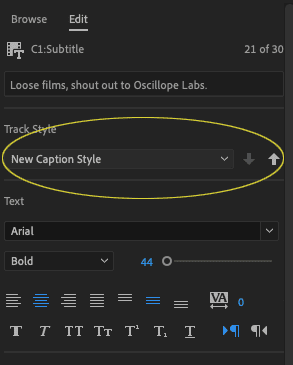
12. Customize the appearance (font, size, background, shadow, etc) of the captions using the “Essential Graphics” window. Remember to have the captions selected on your timeline in order to apply the transformation to all text boxes. If you are going to continue using this same style in the future, make sure to save it. In the “Edit” of the Essential Graphics window there is an option to “Save Style.” With one of your caption boxes selected in the sequence, select the save option.
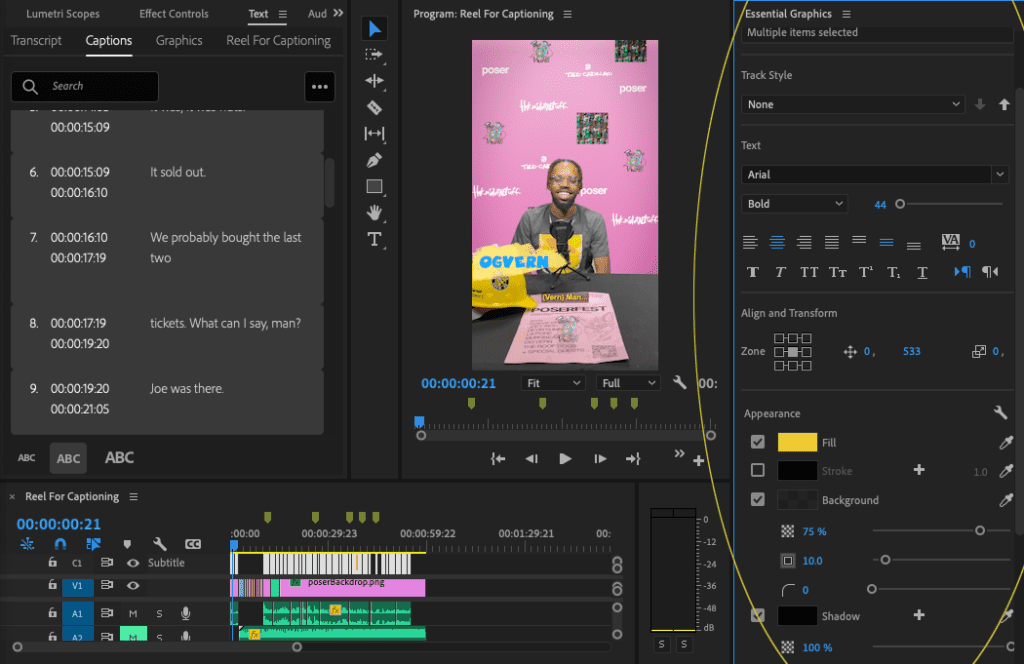
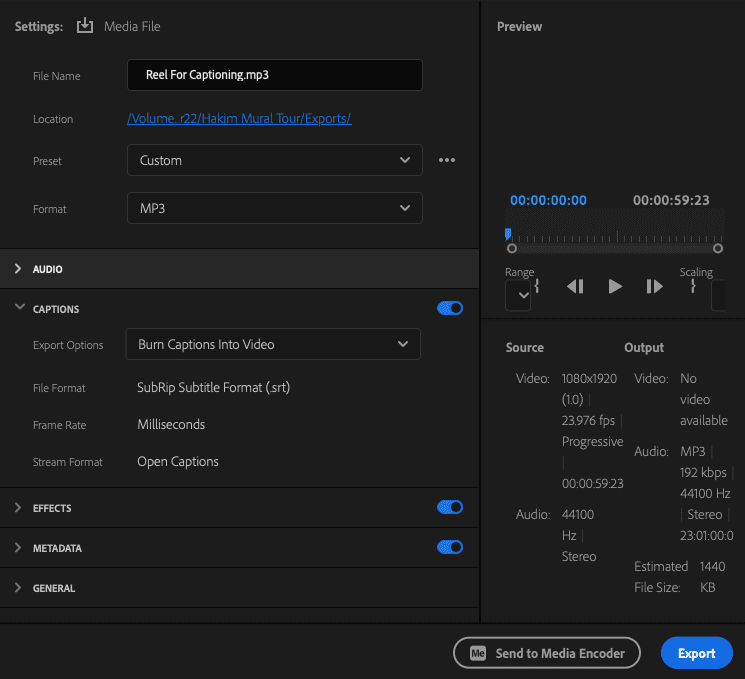
13. Finally, open the “Captions” panel to start an export. Select whether you would like the captions burned into the video, or to create a sidecar, which will enable viewers in browsers to turn the captions on and off.
And that’s it! You’ve now learned how to use Trint to transcribe and caption your video footage. Now the only question is… what will you do with all your new free time?